Expert beading techniques can elevate designs with intricate details. Stringing techniques vary from minimalist to complex forms. Loom beading and brick stitch offer precision and structure. Peyote and right-angle weave introduce textured, versatile aesthetics. Bead crochet and Kumihimo infuse flexibility and geometry. Macrame enhances lace designs with knotting. Knitting and tatting with beads add dimension and texture. Mastery of these techniques allows for stunning creations, expanding the possibilities for intricate patterns and designs.
Stringing for Simple to Complex Designs
Stringing serves as the cornerstone of beading, offering a versatile technique that can transform a simple strand into an intricate piece of jewelry. Bead stringing involves threading beads onto materials like wire, thread, or cord, creating items from minimalist necklaces to complex bracelets. Essential components include beads, beading wire or thread, and clasps, allowing for personalized designs. Knotting between beads enhances both security and aesthetics, preventing friction and maintaining design integrity if the strand breaks. This technique accommodates various bead types, from seed beads for detail to gemstones for elegance, making it accessible for both novices and seasoned beaders.
Mastering Loom Beading for Structured Patterns
To master loom beading for structured patterns, one must begin by properly setting up the loom, ensuring warp threads are evenly spaced and taut. Selecting the right type of warp thread is essential for the stability and durability of the final piece. Understanding and employing effective weaving techniques will enable the creation of intricate designs with precision and speed.
Setting Up Your Loom
Setting up a loom for beading requires careful preparation to guarantee the success of any structured pattern. It begins with attaching warp threads securely to the loom’s pegs. These threads must be evenly spaced and taut, forming the backbone of bead weaving projects. The number of warp threads corresponds to the bead columns, with extras for edges, ensuring ample support. With warp threads in place, a weft thread threaded through a needle is woven over and under, creating the desired pattern.
Key steps include:
- Measure project length for accurate warp thread count.
- Adjust tension for a uniform design.
- Secure ends to finalize the piece.
- Remove warp threads carefully for embellishments.
Warp Thread Selection Tips
Selecting the appropriate warp thread is vital for achieving a successful loom beadwork project. Strong and durable materials, such as nylon or polyester, are recommended beading supplies to withstand bead weight and tension. Warp thread thickness should align with bead size; heavier gauge threads support thicker beads, maintaining design integrity. Color choice, whether complementary or contrasting, can enhance visual appeal, with contrasting colors offering striking effects and matching colors providing seamless looks. Adequate thread length is essential for accommodating beadwork and securing ends. Testing a sample guarantees compatibility and manageable tension, preventing issues before committing to the full design.
Weaving Techniques Explained
Loom beading offers a structured approach to creating intricate designs through the precise alignment of beads on taut warp threads. This technique involves arranging warp threads on a bead loom, which are then interwoven with weft threads to form detailed patterns. By utilizing loom beading techniques, beaders can efficiently produce flat strips or expansive panels for diverse uses, such as purses or wall art. Mastery of these techniques allows for exploration into geometric and complex designs, enhancing overall visual appeal.
- Allows for faster creation compared to off-loom techniques.
- Encourages unique styles through creative bead arrangement.
- Suitable for producing both small and large projects.
- Offers precision in bead alignment and design execution.
Exploring the Intricacies of Bead Embroidery
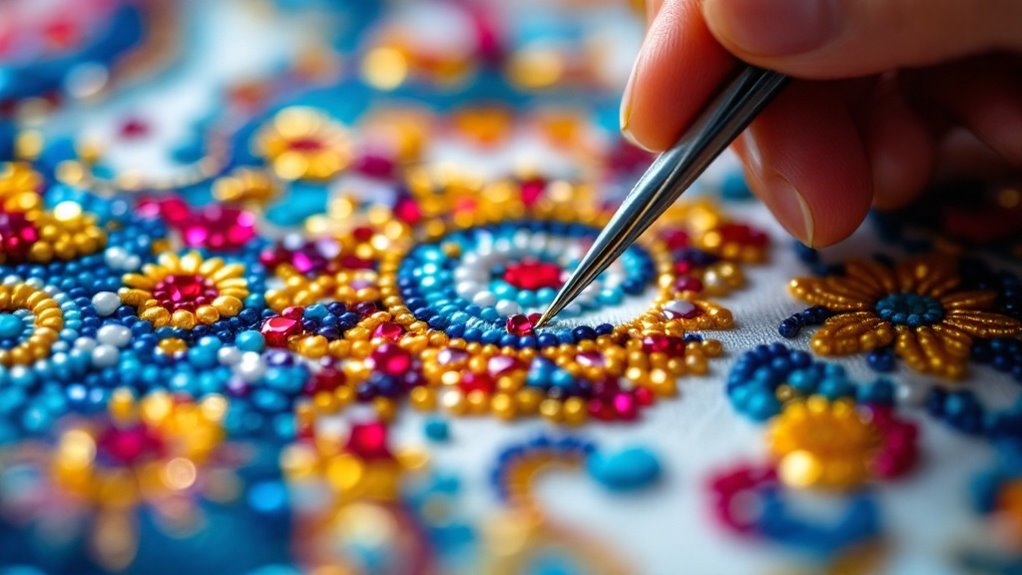
Although often considered a niche craft, bead embroidery captivates with its ability to transform simple textiles into stunning works of art. This meticulous technique involves stitching beads onto fabric, allowing creators to produce intricate designs and embellishments. Essential stitches such as backstitch, lazy daisy, and chain stitch each bring unique textures, contributing to a piece’s overall aesthetic. The choice of backing fabric—be it felt, canvas, or leather—plays a crucial role in supporting the beadwork’s structure. By incorporating diverse bead types, including seed beads, gemstones, and shaped beads, artisans can enhance visual interest, elevating bead embroidery to a versatile form of personal expression.
Peyote Stitch Techniques for Textured Patterns
In exploring peyote stitch techniques for textured patterns, the alternating threading method stands out for its ability to create intricate designs with both even and odd counts. This method allows for versatility in design applications, enabling the creation of flat, tubular, or 3D structures that highlight the texture and color of the beads. Precision and skill are essential, as maintaining consistent tension and proper bead placement are vital to achieving a polished and uniform appearance.
Alternating Threading Method
Crafting mesmerizing patterns with the Alternating Threading Method of the Peyote stitch invites beaders to explore a world of texture and depth. This technique involves sewing each bead in a staggered manner, resulting in a raised, textured design that can be either flat or tubular. It accommodates both even and odd count Peyote, where even count produces symmetrical patterns, while odd count offers greater design versatility.
Key points include:
- Foundation row initiates the process.
- Needle passes through the last bead of the previous row for security.
- Consistent tension is essential for uniformity.
- Suitable for crafting bracelets, earrings, and intricate 3D shapes.
Versatile Design Applications
Building on the intricate patterns formed by the Alternating Threading Method, the versatility of the Peyote stitch becomes evident in its wide range of design applications. This technique allows creators to craft both flat and tubular structures, ideal for intricate jewelry like bracelets and pendants. Executable in even or odd counts, Peyote stitch offers varied textures and complex patterns, enhancing design possibilities. Its effectiveness in geometric patterns showcases stunning visual effects through strategic color placement and bead selection. Expert beading tips suggest combining Peyote stitch with techniques like fringe or embellishments, adding additional dimensions and visual interest to the final piece.
Precision and Skill Requirements
Often requiring meticulous attention, the Peyote stitch demands precision in bead placement and tension control to achieve clean, textured patterns. Mastery over this technique is essential for creating intricate beading patterns that captivate viewers. Understanding the nuances between even and odd count Peyote stitches is vital, as they influence the beadwork’s shape and structural integrity. Employing the correct needle size and strong thread guarantees durability and precision. Practice with uniform seed beads enhances smooth row shifts and pattern consistency. Advanced techniques, such as increasing and decreasing stitches, facilitate the development of complex, visually engaging designs.
- Precise bead placement
- Tension control
- Even vs. odd count techniques
- Needle and thread selection
Brick Stitch for Neat, Stacked Designs
In the world of beading, brick stitch stands out for its neat and structured aesthetic, resembling rows of perfectly aligned bricks. This technique begins with a foundation row made using ladder stitch, providing a stable base for additional bead rows. Each bead is threaded through the previous row, ensuring a secure attachment that contributes to the design’s stability. Brick stitch is versatile, suitable for creating both flat and three-dimensional forms like jewelry and decorative pouches. Mastery of this technique demands practice and precision, with consistent tension being key to achieving neat, uniform results in every intricate beadwork project.
Right-Angle Weave for 3D Creations
Right-Angle Weave (RAW) is a versatile technique that allows beaders to construct intricate 3D structures, such as boxes and pendants, by threading beads in a square formation. This method, characterized by threading through beads at right angles, creates detailed weave patterns that are both sturdy and flexible. By incorporating various bead types, beaders can enhance the texture and visual interest of their creations, making RAW a favored choice for those seeking to customize and innovate in their projects.
Versatile 3D Structures
A treasure trove of possibilities awaits artisans with the right-angle weave (RAW), a beading technique known for crafting intricate 3D structures. RAW allows for the creation of complex shapes such as cubes and spheres by weaving beads together at right angles, forming a strong and flexible fabric. This technique utilizes four beads per unit, accommodating various bead sizes and types, enhancing designs with visual intrigue. Mastery of RAW demands patience and precision, ensuring consistent tension and bead placement for professional outcomes.
- Complex Shapes: Create cubes, spheres, and pendants.
- Versatile Materials: Use seed and shaped beads.
- Crafting Flexibility: Adaptable for jewelry and textiles.
- Skill Enhancement: Essential for advanced beaders.
Detailed Weave Patterns
Detailed weave patterns in beadwork open up a world of creativity, especially with the right-angle weave (RAW) technique for 3D creations. This advanced beading method forms a robust fabric by connecting beads at right angles, ideal for crafting flat, tubular, and intricate three-dimensional objects. Beginners can start with basic RAW patterns and progress to complex designs, enhancing their overall beading proficiency. By combining RAW with other stitches and embellishments, artisans can achieve dynamic 3D effects. Consistent tension and precise bead placement are essential, ensuring structural integrity and a polished finish, ultimately broadening the creative possibilities in beadwork artistry.
Bead Crochet for Unique, Flexible Designs
Transform crochet projects into eye-catching creations by incorporating bead crochet techniques, which skillfully blend the art of crochet with the allure of beads. By threading beads onto yarn before starting, creators can achieve flexible and textured designs suitable for various items. Mastering basic crochet skills is essential for successfully executing these projects, ensuring stitches and tension are maintained.
Bead crochet offers opportunities for creative expression, from simple bracelets to intricate shawls. Different bead sizes enhance depth and visual interest, ideal for jewelry and decorative pieces. For those interested in learning, beadwork tutorials can serve as valuable resources.
- Combines crochet with beads
- Uses varied bead sizes
- Suitable for jewelry and décor
- Requires crochet basics mastery
Kumihimo With Beads for Geometric Patterns
Kumihimo captivates with its fusion of traditional Japanese braiding and the modern twist of bead incorporation, resulting in stunning geometric patterns. This intricate technique involves pre-stringing beads onto cords before braiding using a kumihimo disk or marudai. These tools maintain tension and alignment, essential for achieving precise geometric designs. By varying bead placement and types, artisans create diverse visual effects, crafting beautiful and durable jewelry such as bracelets and necklaces. Engaging in kumihimo with beads enhances skills in color coordination, tension management, and pattern creation, making it an invaluable practice for those seeking to elevate their beading expertise.
Macrame Beading for Lace-Like Creations
While macrame might traditionally evoke images of bohemian decor, macrame beading elevates this craft to a new level of intricacy and elegance. By combining knotting techniques with beads, artisans create lace-like designs that are both decorative and functional. Beads are typically pre-strung onto the cord before knotting, adding visual interest and texture. Common knots like the square and lark’s head are integral, supporting the pattern’s structure.
- Versatile Creations: Ideal for jewelry, wall hangings, and decor.
- Unique Designs: Various bead sizes and shapes enhance complexity.
- Artisanal Appeal: Appeals to a wide range of crafting enthusiasts.
- Intricate Patterns: Knotting techniques form lace-like patterns.
Knitting and Tatting With Beads for Added Texture
Incorporating beads into knitting and tatting infuses projects with a new layer of texture and visual intrigue. For knitting, pre-stringing beads on yarn allows seamless integration into stitches, using techniques like yarn-over or purling. Bead tatting, a lace-making method, requires threading beads onto shuttle thread, embedding them within knots for durable, textured lace. When beading for beginners, it’s essential to take into account bead size and weight to maintain design integrity. Experimenting with bead placements and stitch patterns can enhance creativity, adding color and dimension to accessories like shawls and scarves, making each creation distinctively unique and visually appealing.
Conclusion
In the world of beading, a myriad of techniques offers endless possibilities for creating intricate designs. From the simplicity of stringing to the structured precision of loom beading, each method brings its own charm and complexity. Techniques like bead embroidery and peyote stitch introduce texture and depth, while bead crochet, kumihimo, and macrame offer unique flexibility and pattern. By mastering these diverse techniques, artisans can transform beads into exquisite works of art, showcasing both creativity and craftsmanship.


Leave a Reply